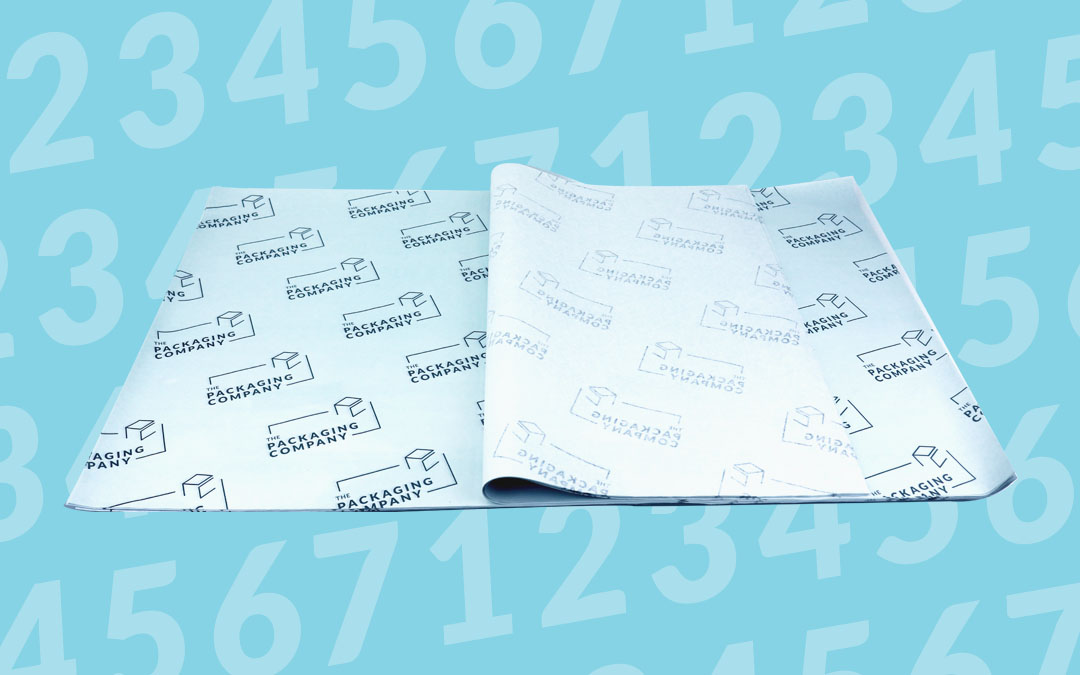
Your business is doing so well that you’re ready to invest in custom branded packaging. So, where do you start? Custom printed boxes are sweet, but maybe they’re a bit outside your price range? That’s okay: we suggest 2-colour custom tissue paper.
It’s good looking, it’ll have your logo and branding all over it, and it’s a versatile and cost-effective packaging option. With our new custom tissue maker, we’re here to help you and your business turn out some fantastic stuff.
Here’s all it takes to make good looking custom tissue paper with The Packaging Company.
1. Upload Your Logo
Press that big blue button that says Upload Logo and follow the prompts you see. Your logo will be tiled across the default tissue pattern, and you’re ready to create. But, before you move onto the fun stuff, we’ve got a few tips that’ll make your time with the tissue maker easier, and maximize the quality of your finished custom tissue paper.
File Formats: We accept a bunch, but we suggest you keep to vector-based (line art) formats like EPS and PDF for best quality. Whatever you choose, don’t forget to use CMYK!
Image Resolution: 300 DPI. Any lower and your design may not be totally crisp and clear on the final product.
Logo Colour: Just 1. Our tissue maker will turn a multi-colour logo into a 1-colour logo. That will change its appearance in unexpected ways (though that might make for a cool-looking design!). We suggest uploading in black, then using Logo Colour to change it.
2. Choose A Pattern
The pre-loaded patterns make setting up your custom tissue paper a breeze. Simply choose the one that fits you best, then use the tools on the left side of the screen to customize your pattern. You can make your logo bigger or smaller, or rotate it in either direction. Talk about easy-to-choose and easy-to-use!
Got an idea for a base pattern? We’d love to see it!
3. Choose Logo Colour
Here’s one of the most fun parts of making custom tissue paper—choosing the colour! Whether you’re browsing until you find something or looking to match your brand colours exactly, we’ve got a bunch of ways to make your choice.
Colour Dots: Save time by choosing one of these pre-selected circles.
Palette Rainbow: Search for the perfect colour using this handy little option.
HEX Input: Choose the exact colour you want by inputting your HEX code.
4. Choose Paper Colour (Optional!)
Standard white’s the base of all our custom tissue paper. But if you’re itching to dial up your tissue’s look, you can make the paper any colour you like. It adds a little extra to your total, but trust us, it’s so worth it in the end.
5. Choose Your Quantity
There’s just one more decision to make: how many sheets will your business need? It’s a good question—one you can answer by figuring out a few things:
Is it for one product, or your whole product line?
Is it for a special occasion like the Christmas shopping season, or everyday use?
Do you have limited storage space, or do you like to load up for months?
6. Checkout!
Now it’s time for the other big blue button: Add to Cart!
You’ll head to our checkout area, where you can enter your contact, shipping and payment info. Click Place Order and your pattern will start its journey from screen to print. It won’t be too long before it’s in your hands (and your boxes, and your shopping bags, and your mailers).
BTW: Not feeling the patterns you see, or wanting to try your own? Get in touch with us, we’re able to help you bring that design in your head to life!
Custom tissue paper is a great way to stand out—and it’s a great addition to your unboxing strategy. With our custom tissue maker, good looking 2-colour custom tissue paper is only a few clicks away. We’re big fans of custom branded packaging and we can’t wait to see what you create!